Retrofit Stability Upgrades: Longer Feet, Crossbars, and Reinforcement Plates That Calm Your Standing Desk
If your standing desk feels “almost” stable—fine when seated, a little ripply at full height—there’s a good chance you can fix it without replacing the whole system. Small structural upgrades and a disciplined rebuild turn a wobbly setup into a quiet, planted height adjustable desk that finally feels ergonomic at any posture. This guide shows the highest‑leverage retrofits: longer feet, a stiffer crossbar, reinforcement plates under clamp zones, and a cable management rebuild that eliminates false anti‑collision trips and “mystery” buzz.
Start with a 10‑minute diagnosis (don’t skip)
-
Corner push at standing height: Gently push a front corner. If the surface oscillates and takes more than a second to calm, you need more stiffness and/or better torque.
-
Arm clamp test: Extend your monitor arm fully and repeat the push. If wobble worsens, you have excessive leverage at the clamp zone or a thin desktop.
-
Noise sweep: Lift from bottom to top with your real load. A refined setup lands around the mid‑40s dB(A) at ear height. Buzzes usually trace to loose power bricks; creaks to under‑torqued joints.
-
Floor check: On carpet or floating floors, levelers can mask slope when seated. Always re‑level at the standing preset.
Upgrade 1: Longer feet (the fastest pitch control)
What they do
-
Longer, gusseted feet increase the restoring moment against front‑to‑back pitch—the wobble you feel when typing or leaning. They are especially effective on 30‑inch‑deep tops and with heavy monitor arms.
How to pick and install
-
Match your desk frame family: Many manufacturers offer “long foot” options that bolt to the same lifting columns.
-
Look for rear gussets and thick section: Stamped, flimsy feet add length without stiffness.
-
Install tips: Loosen, align, and finger‑start all foot bolts. After squaring the frame, torque foot bolts in a star pattern. Re‑level at standing height.
When it’s enough
-
If pitch was your main complaint and side‑to‑side yaw was acceptable, longer feet alone can transform feel—especially on a T‑leg frame or a C‑leg with deep tops.

Upgrade 2: Reinforced (or replacement) crossbar
What it does
-
A deep, closed‑section crossbar ties the columns together and resists racking (parallelogram deformation)—the yaw you see when you nudge a corner or when arms are extended.
Signs you need it
-
The desk passes a straight‑ahead typing test but shimmies when you tap a front corner or when the arm is out. You may also hear a creak near the center at certain heights.
How to choose
-
Prefer a tall, closed‑section tube (not a thin C‑channel). Telescoping is fine—look for thick sleeves and ample overlap.
-
OEM replacements: Many frames offer a “heavy‑duty” crossbar upgrade. Aftermarket bars exist but verify hole patterns.
Install and torque sequence (critical)
-
Loosely assemble the bar at your target width (desktop minus 2–3 inches).
-
Square the desk frame; use the desktop as a reference if needed.
-
Torque crossbar bolts in a star pattern from the center outward.
-
Retorque foot bolts; then re‑level at standing height.
Upgrade 3: Reinforcement plates under clamp zones
What they do
-
Steel plates under the desktop where monitor arms clamp spread the load, stiffen thin or soft cores, and reduce local flex that excites wobble.
When they help most
-
Tops thinner than ~25 mm, hollow cores, bamboo, soft composites, or any top showing clamp dents. Heavy ultrawides benefit even on dense 25–30 mm laminate.
How to install
-
Plate size: 3–5 mm thick, large enough to exceed the clamp footprint by 40–50 mm in all directions, but still within the desk frame footprint.
-
Placement: Center the plate under the clamp zone; add a second plate for dual arms. Deburr edges; use double‑sided industrial tape or short screws into inserts (never through‑drill).
-
Clamp near a leg: Moving the clamp closer to a lifting column shortens the lever arm—big effect, zero cost.

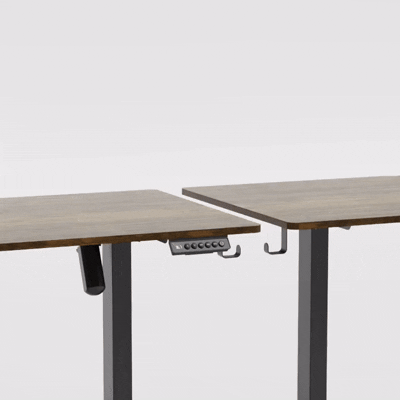
Upgrade 4: Cable management rebuild (stability’s stealth ally)
Why it matters
-
Tight or tangled lines tug the frame during motion, trip anti‑collision, and even pull on monitor arms—mimicking “wobble.” Cleaning the harness often cures what looks like a structural problem.
The backbone pattern
-
Rear tray + surge strip: Mount a metal cable tray under the rear edge; fix a surge‑protected strip inside. This converts many cords into one clean power drop.
-
One vertical cable chain: Guide a single trunk to the floor or power spine. No tails across walkways.
-
AC/data separation: Keep bricks and mains on one side of the tray; route DisplayPort/HDMI/USB/LAN on the other to reduce hum and flicker.
-
Service loops at pivots: Leave small slack loops at monitor arm joints and at the control box so nothing goes taut at either travel extreme.
-
Strap every brick: Loose adapters are the No. 1 source of buzz and “mystery” vibration.
Upgrade 5: Fasteners, torque, and sequence (the hidden fix)
-
Clamp force beats “tight”: For M6 bolts into steel, target ~7–10 N·m; for M8, ~18–25 N·m (follow your manufacturer’s spec). Use flat washers to protect powder coat; a dab of blue threadlocker on steel‑to‑steel joints helps in high‑use setups.
-
Star pattern: Loosely assemble, square, then torque crossbar bolts in a star pattern. Repeat for foot bolts. Level at standing height.
-
Controller bracket and strip: Tighten keypad and tray hardware; add a thin EVA pad under the power strip to kill resonance.
Optional but potent: Column upgrade (three‑stage swap)
-
If your frame uses two‑stage lifting columns and you’re at the tall end of range—or you run a deep top with heavy arms—moving to three‑stage columns increases stroke length and overlap (stiffness) at height. It’s the most expensive retrofit but the most transformative when range and wobble are both issues.
Level the floor (really)
-
Concrete, tile, LVT: Replace glazed rubber foot pads; clean dust. Long feet + traction pads prevent “walking.”
-
Carpet tiles: Re‑level at standing height; add rigid plates under pads if seams compress. Floating floors: verify all feet contact; avoid caster drift with floor cups.

Reset, test, and tune (prove the gains)
-
Reset: Clear the area; hold “Down” on the desk controller to the mechanical stop until the display beeps or shows RST; cycle once.
-
Anti‑collision tests: Lower onto a foam block (down) and raise under a padded shelf (up). Fix cable drag before changing sensitivity.
-
Corner push: At standing height, repeat the push test. With longer feet and a stiffer bar, damping should be crisp and quick.
-
Lift noise: Spot‑check at ear height with a phone app. A refined height adjustable desk should land around mid‑40s dB(A) with smooth ramps.
Quick decision tree
-
Pitchy on deep tops? Install longer feet first. If corner shimmy remains, add the heavy‑duty crossbar.
-
Clamp dents and local flex? Add reinforcement plates and move clamps near a leg.
-
Random stops and flickers? Rebuild the harness: tray + one drop + service loops + bricks strapped.
-
Tall users on two‑stage legs? Consider three‑stage column swap; keep the other retrofits.
Common pitfalls (and fast fixes)
-
Over‑torqued wood screws: Replace with threaded inserts and snug machine screws; do not crush the core.
-
Feet installed backward: Ensure long toes project forward (not into the gap on face‑to‑face benching).
-
Crossbar rubbing: Maintain a small clearance to the desktop underside/subframe; shim if needed to prevent buzz.
-
Ignoring the floor: Level at standing height. On carpet, re‑check after a week; materials relax.
A retrofit checklist to paste into your work order
-
Feet: Upgrade to long, gusseted feet; install and torque in a star pattern; re‑level at standing height
-
Crossbar: Replace with heavy‑duty closed‑section bar; square and torque in sequence
-
Reinforcement: Steel plates under monitor arm clamps; move clamps near a lifting column
-
Cable management: Rear tray + surge strip; one vertical cable chain; AC/data separation; service loops; bricks strapped
-
Fasteners: Washers/threadlocker on steel‑to‑steel joints; torque to spec; tighten controller bracket
-
Tests: Reset; anti‑collision down/up; corner push at standing height; lift noise spot‑check
Most “just a bit wobbly” standing desks don’t need replacing. They need leverage, stiffness, and cleanliness: longer feet to fight pitch, a reinforced crossbar to stop racking, reinforcement plates under clamp zones, and a cable management rebuild that removes tug and buzz. Add correct torque and leveling at your standing preset, and your height adjustable desk will feel quiet, planted, and truly ergonomic—ready for real work.
-
Explore long‑foot kits, heavy‑duty crossbars, reinforcement plates, and cable management that retrofit stability into your standing desk at Venace: https://www.vvenace.com
-
Contact us: tech@venace.com